The new model has the name TK47 and features some interesting ideas as well as implementing a new LED from Cree-the high intensity XHP35Hi.
At first look the form factor is typical for a dual battery flashlight with batteries positioned in line.
The battery tube is a little larger diameter and thicker than some of the more compact rivals.
This is due to the new for Fenix dual beam design.
Look at the picture below to figure out the position of the second beam.


That's right,Fenix came with an interesting idea bringing some more progress to the flashlight designing.
The TK47 is equipped with two electronic switches-one at the tail,one at the side.
Unlike other flashlight the side switch is only operating the front powerful beam.
The second is dedicated to the built-in diffused light in the tail-containing the switch.
To extend the potential of the flashlight,Fenix's engineers are included two different light sources.
The tail light is able to deliver a pleasing diffused neutral white light as well as nice low brightness red light that may come in use in specific cases.
The white diffuser cap is made of plastic.Looking from the outside,the diffuser seems thick and sturdy.
Both switch covers are made of metal for better reliability.

A close look at the Cree XHP35 Hi LED mounted in Fenix TK47.
Pretty well centered on my sample,ensuring precisely focused beam with optimal throw.

Here is the front of the flashlight with the LED at very low brightness.

Zoom in at the LED for better view of its four core design.
There are very thin darker lines between the four zones.However they are very far from what we have
seen in other bigger LEDs and I did not find any affecting of them in the beam.

You can learn more about the LED from the Cree's very detailed XHP35 datasheet-
http://www.cree.com/led-components/m...s/ds-XHP35.pdf
This is the specification table provided by Fenix describing all measured aspects of the beam on all different brightness modes.

Lumen readings:
(with my not professional equipment)
Turbo mode 1350 Lm 30sec after activation
High mode 450 Lm
Mid mode 110 Lm
Low mode 15 Lm
Tail light 35 Lm
Peak beam intensity readings with my not professionally calibrated luxmeter-
138,700cd measured at 5 meters 30 sec after activation.
User Interface
(Copy/paste from the user sheet)
On/Off① In unlocked status, press and hold the side switch for 0.5 seconds to turn on/off
the headlight.
② Press and hold the tail switch for 0.5 seconds to turn on/off the tail light.
OUTPUT SELECTION
③ Headlight: When the headlight is on, single click the side switch to cycle through
Low→Med→High→Turbo.
④ Tail light: When the tail light is on, single click the tail switch to cycle through
White light→Red light→Red flash→Red SOS.
⑤ STROBE
In unlocked status, press and hold the tail switch for 1.5 seconds to activate Strobe.
Single click the side switch once again, the light will return to General brightness.
⑥ LOCK-OUT FUNCTION
Lock: When the headlight is off and unlocked, double click the side switch; the light
will blink at Med twice, indicating the headlight is locked.
Unlock: When the headlight is off and locked, double click the side switch, the light
will be unlocked and turned on the last used output level.
Note: In locked status, the light only responds to unlocking operation; single click the side switch, the
headlight will blink twice to remind the light is under locked status.
INTELLIGENT MEMORY CIRCUIT
The headlight memorizes the last brightness level used in the General mode. The next
time it is turned on, it will recall the previously used General brightness level.
The tail light is defaulted on White light each time it is turned on again.
INTELLIGENT OVERHEAT PROTECTION
The light will accumulate a lot of heat when used at Turbo output level for extended
periods. When the light reaches a temperature of 65℃ or above, the light will
automatically step down by a few lumens to reduce temperature. When the
temperature is reduced, the output will gradually return to Turbo output level.
LOW-VOLTAGE DOWNSHIFT FUNCTION
When the voltage level drops below the preset level in working condition, the
flashlight will start downshifting to lower brightness levels until Low output is
reached, in order to remind you to replace the batteries. To ensure normal use, the
light will not turn off and will work until the over-discharge function stops the battery
from working.
My comments:
-I see no clear info about Low voltage protection in the flashlight.As usual it is recommended to use batteries with a built-in protection,
especially in flashlights with batteries connected in series like this one.
-Even though to press and hold the switch in order to activate the light is not my most convenient way of operating a flashlight,it became very common and I don't think about it as much now.
However for some losing the momentary On function and possibility to use the flashlight for signaling may be a drawback.
(I also like to be able to turn the light On for a second or two and then just to release the switch and turn the light Off.)
Here we have to keep the switch pressed for 0.5 seconds,which in some cases may cause slow operation-if you use the light frequently for short periods of time.
If you use the light constantly On for long periods of time,the press and hold operation should not be noticeable,once you get used to it.
Something a little annoying I experienced while turning the light off is the way of activating the Strobe mode.
If I keep the switch pushed longer than 0,5 seconds,the driver does resister this as an operation to activate Strobe mode.
What happens is that trying to turn Off the light,I am activating Strobe mode.
The side switch should not be held pressed for longer than 0,5 seconds.

A closer look at the tail cap.
The tail switch is easy to access and press.All edges of the tailcap are well rounded.

The tail-cap is designed to allow tail-stand capability.
This is a good option and may come in use.However,the 'ears' of the tail cap are well rounded,which ensures comfortable operation of the switch,
but they can keep the long and heavy flashlight steady only on an absolutely horizontal board without any shaking.Even a light vibration may lead to flashlight dropping.
A strap/lanyard can be attached to the holes in the tail 'ears' or to the small holes at the top of the tailcap,visible on one of the pictures below.

The tail light has four modes-White,Red,Flashing Red,SOS Red
Operation order-
When the tail light is on, single click the tail switch to cycle through
White light→Red light→Red flash→Red SOS.
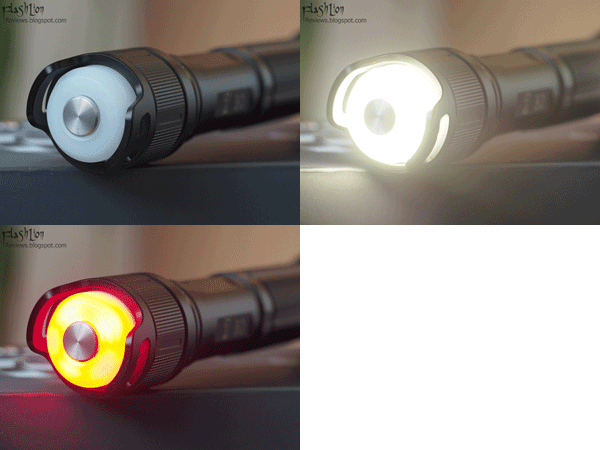
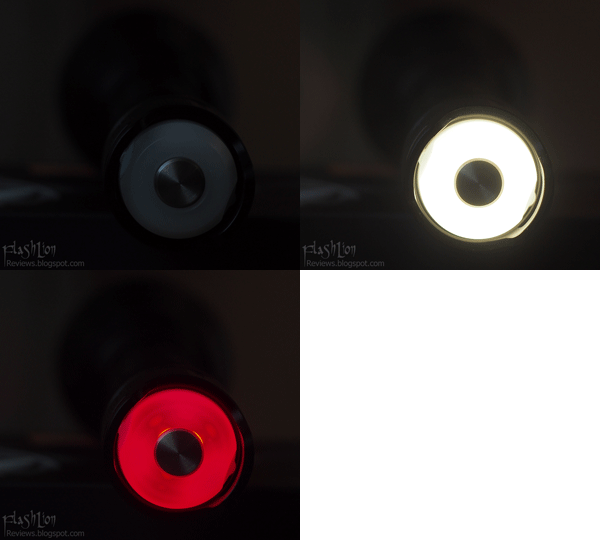
On the left picture the light looks orange,but this is only a result of the way almost any camera captures red light in higher exposure pictures.
You can often see this effect in videos with car rear lights.
I was impressed to see the TK47 packed in such a sturdy carton box.
Everything is well protected inside thanks to a thick foam pads cut in desired form.
The box seems suitable for storing and carrying the flashlight especially with the handle,but the edges of the cardboard on my sample
are bent/smashed and closing the box takes me too much effort.


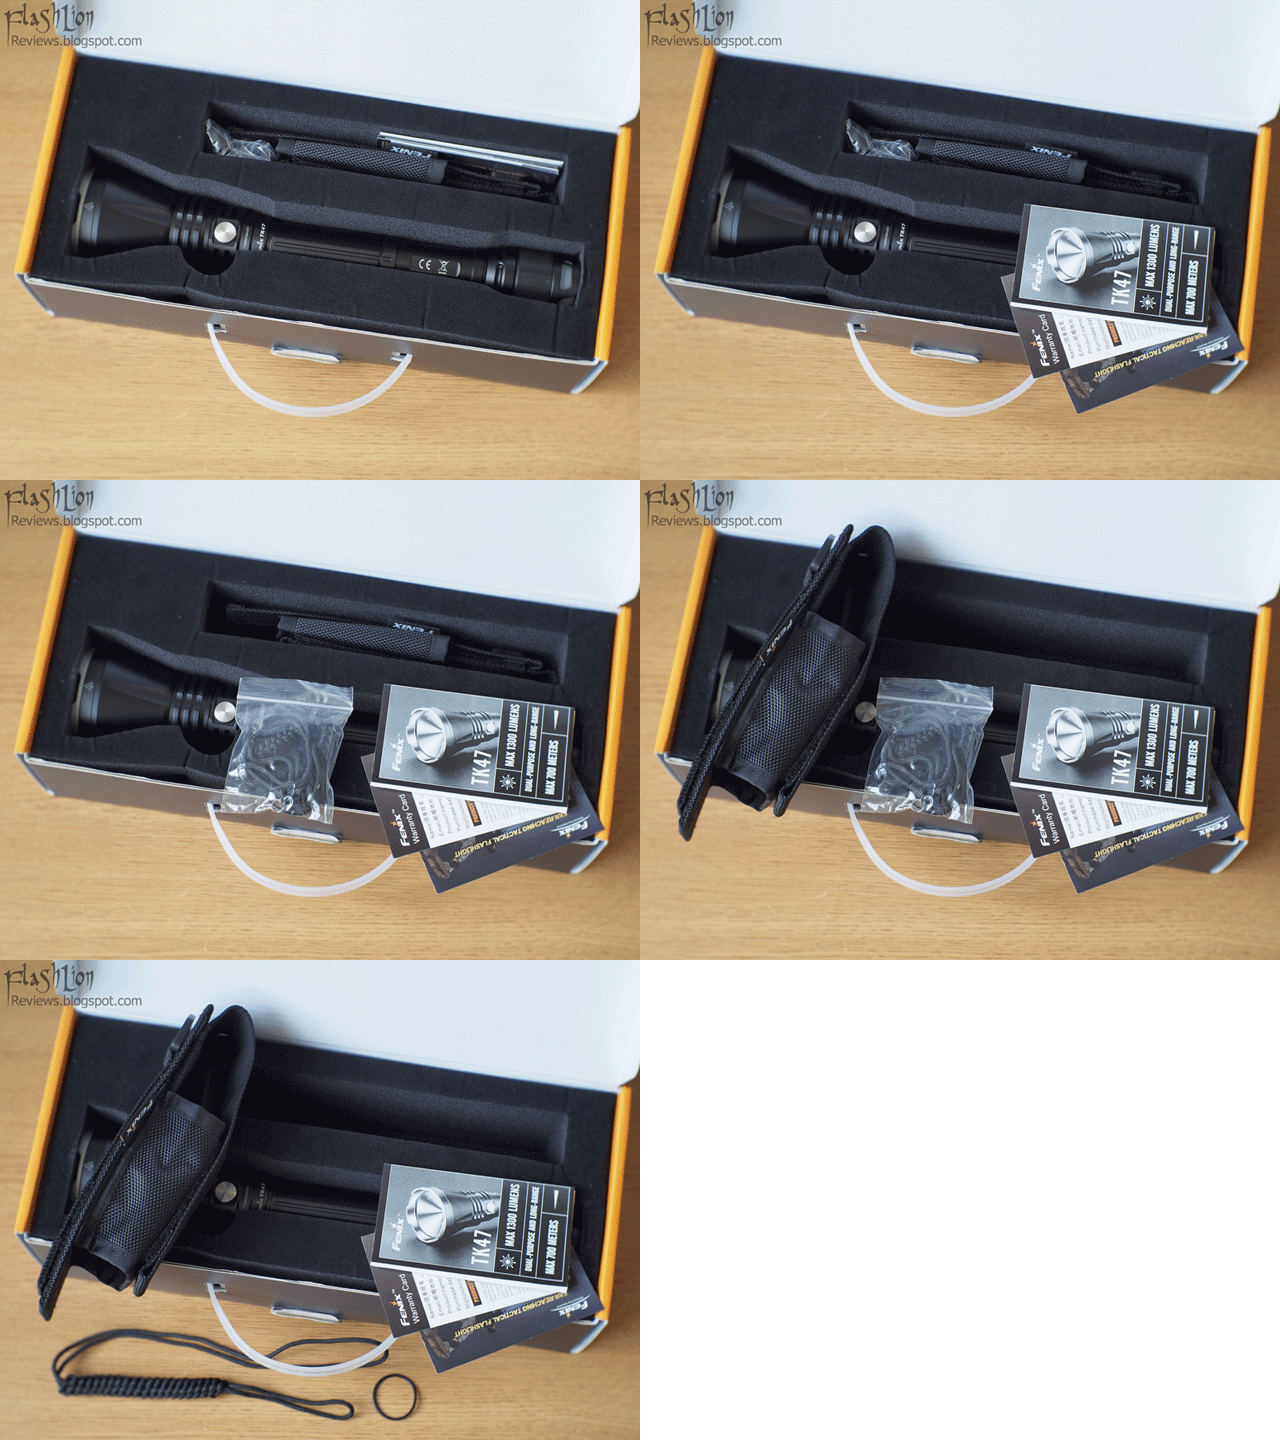
Here is animated what's in the box.
A simple,but good holster,User Guide,Warranty card,Small brochure with other Fenix models,Single O-ring and nicely tangled lanyard.
This is a comparison with two other good 2x18650 flashlights.ThruNite Catapult V5 and Olight M3XS UT.
The M3XSUT is visibly with smaller diameter battery tube.The Catapult V5 however is made of very thick aluminum and its battery tube is larger than the dual layer TK47 tube.

Weight with batteries-
Fenix TK47 475 gr.
ThruNite Catapult V5 652gr.
Olight M3XS UT 367gr.
Olight SR52 UT 535gr.(485gr. with two batteries)
A look at the reflectors.
Catapult V5 with Cree XM-L2 NW, Fenix TK47 with Cree XHP35 Hi NW and Olight M3XSUT with Cree XP-L CW de-domed.

The holster is just enough to keep the reflector slightly protected and to allow attaching the flashlight to a belt.
There is a plastic 'ring' for attaching,also a Velcro tape,which is actually the strongest I have used.It requires a lot of force to peel it off.
I would prefer a better protection for the front of the flashlight,though.A wider and thicker cap would make the holster suitable for even more cases.
The sides of the holster are made of soft material and do not provide protection of accidental press of the side switch.
It is recommended to electronically-lock the switch while the flashlight is in the holster and especially when carrying it in a backpack.
Lock-out the tailcap is also possible by unscrewing it a few turns. This is the most secure way to prevent unwanted activation.

Zoom at the metal switch pattern(some moire caused by jpg compression visible on my monitor).
You can see also the interesting and effective knurling.
Thick cooling fins ensure proper heat dissipation. The overall machining is smooth and precise.

Here we can see the rear end of the battery tube(the frond end is glued) and the tail cap.
At first look the tail cap seems like a regular one,but after seeing the dual layer battery tube,we realize that the tail cap actually has three contact points.
Two with the battery tube and one with the negative pole of the rear battery.
What is the point of this design?
To be able to power up the LEDs at the tail,as usual we need a contact with the positive and negative poles of the battery.
Here we have negative through the spring and two contacts through the tube layers coming from the driver.
I can mostly guess,but the purpose is most likely to separate both circuits-Main beam/tail light as they could not operate through one circuit.
We have already seen this design a few years ago in flashlights like Klarus RS11 where the purpose of the two layers was allowing tail charging contact point.
Ass we can expect the thickness of the battery tube is affected,but not that noticeable for a relatively big flashlight.

Anodized rectangular cut threads.Single O-ring.

A picture that may help you to compare the size of the tailcap and head with 18650 size batteries.
The side switch is comfortable to press.It is a little too soft in my opinion.I may prefer a harder to press switch-this will ensure
better protection of unwanted activation and also will be harder if small kids get to play with it.
Finding the switch in the dark is challenging as with almost any other side switch light.It takes some time to adjust the flashlight in the hand.
The crenelated bezel allows you to see if you accidentally forget the light activated when placing it on a table.

Runtime Performance
Fenix TK47 was tested on Turbo and High mode.
Batteries used for the test Keeppower 3400mAh.
A small cooling fan was used in the Turbo mode runtime test,to ensure measuring the optimal performance.
The LED in the TK47 requires high voltage with low current draw.
I was not sure what to expect as a consistency of the regulation.
Fenix has done a great job on the driver and as we can see on the graph,the output is absolutely constant right after the first seconds.
The TK47 delivered almost constant light in a period of 55 minutes.
I can't hide that I was impressed,especially knowing the performance of the other flashlights that I use for comparison.
Fenix TK47 has voltage dependent control over the output.
Once the voltage drops to a certain value,the driver will step down to the lower mode in the sequence.
In the test from Turbo to High mode after 55 minutes.
From High to Mid mode after 94 minutes (after High mode).
From Mid to Low mode after 107 minutes (after Mid mode).
This step downs have the purpose to conserve some power in the battery allowing you some(in this case very long) time to find fresh batteries or just to have some lower output in emergency situations.
I stopped the test after the TK47 was running on Low mode for 16 minutes. The resting battery voltage in each battery was 3,33V.
This means there still was enough power to run Low mode for an hour or two.
In my opinion we could get even longer constant Turbo run sacrificing the very long periods after step down,but I am not familiar with the driver
and this may be a specific characteristic that limits the efficiency at lower voltage.
According to the provided by Fenix data,the TK47 has intelligent overheat protection,which triggers at 65C degree. The output in this state will be slightly decreased until the temperature recovers to a level below 65C.
I did not manage to activate the protection in my test and I did not intentionally tried to trigger it,so far. However I will probably try to do it some time later.
The High mode delivered constant light of 450 lumens for 354 minutes(almost 6 hours).Then again it goes to the lower Mid and Low modes for another few hours.
Check out the second graph below to see how other flashlight powered by two 18650 batteries perform even their lower voltage LEDs.

Below is the expected comparison graph illustrating the job done of the electronics in each flashlight.
All flashlights activated on their highest mode and left static for the test.
Flashlights compared-
Fenix TK47 (two 18650 in series =8,4V)
ThruNite Catapult V5 (two 18650 in series =8,4V)
Olight M3XSUT (two 18650 in series =8,4V)
Olight SR52UT (three 18650 in parallel =4,2V)
The SR52UT shows somewhat linear drive pattern typical for a boost driver-highly dependent on the voltage even its additional battery,
just because its batteries are connected in parallel and deliver just 4,2V.
The Catapult V5 and M3XSUT are programmed to decrease their brightness after timed step down.
The Catapult V5 does step down even its massive aluminum body.
The M3XSUT is made of much thinner aluminum,so their need to protect from overheating is more relevant.Yet there is a lot more to be desired.

Animated GIF of the reflector.
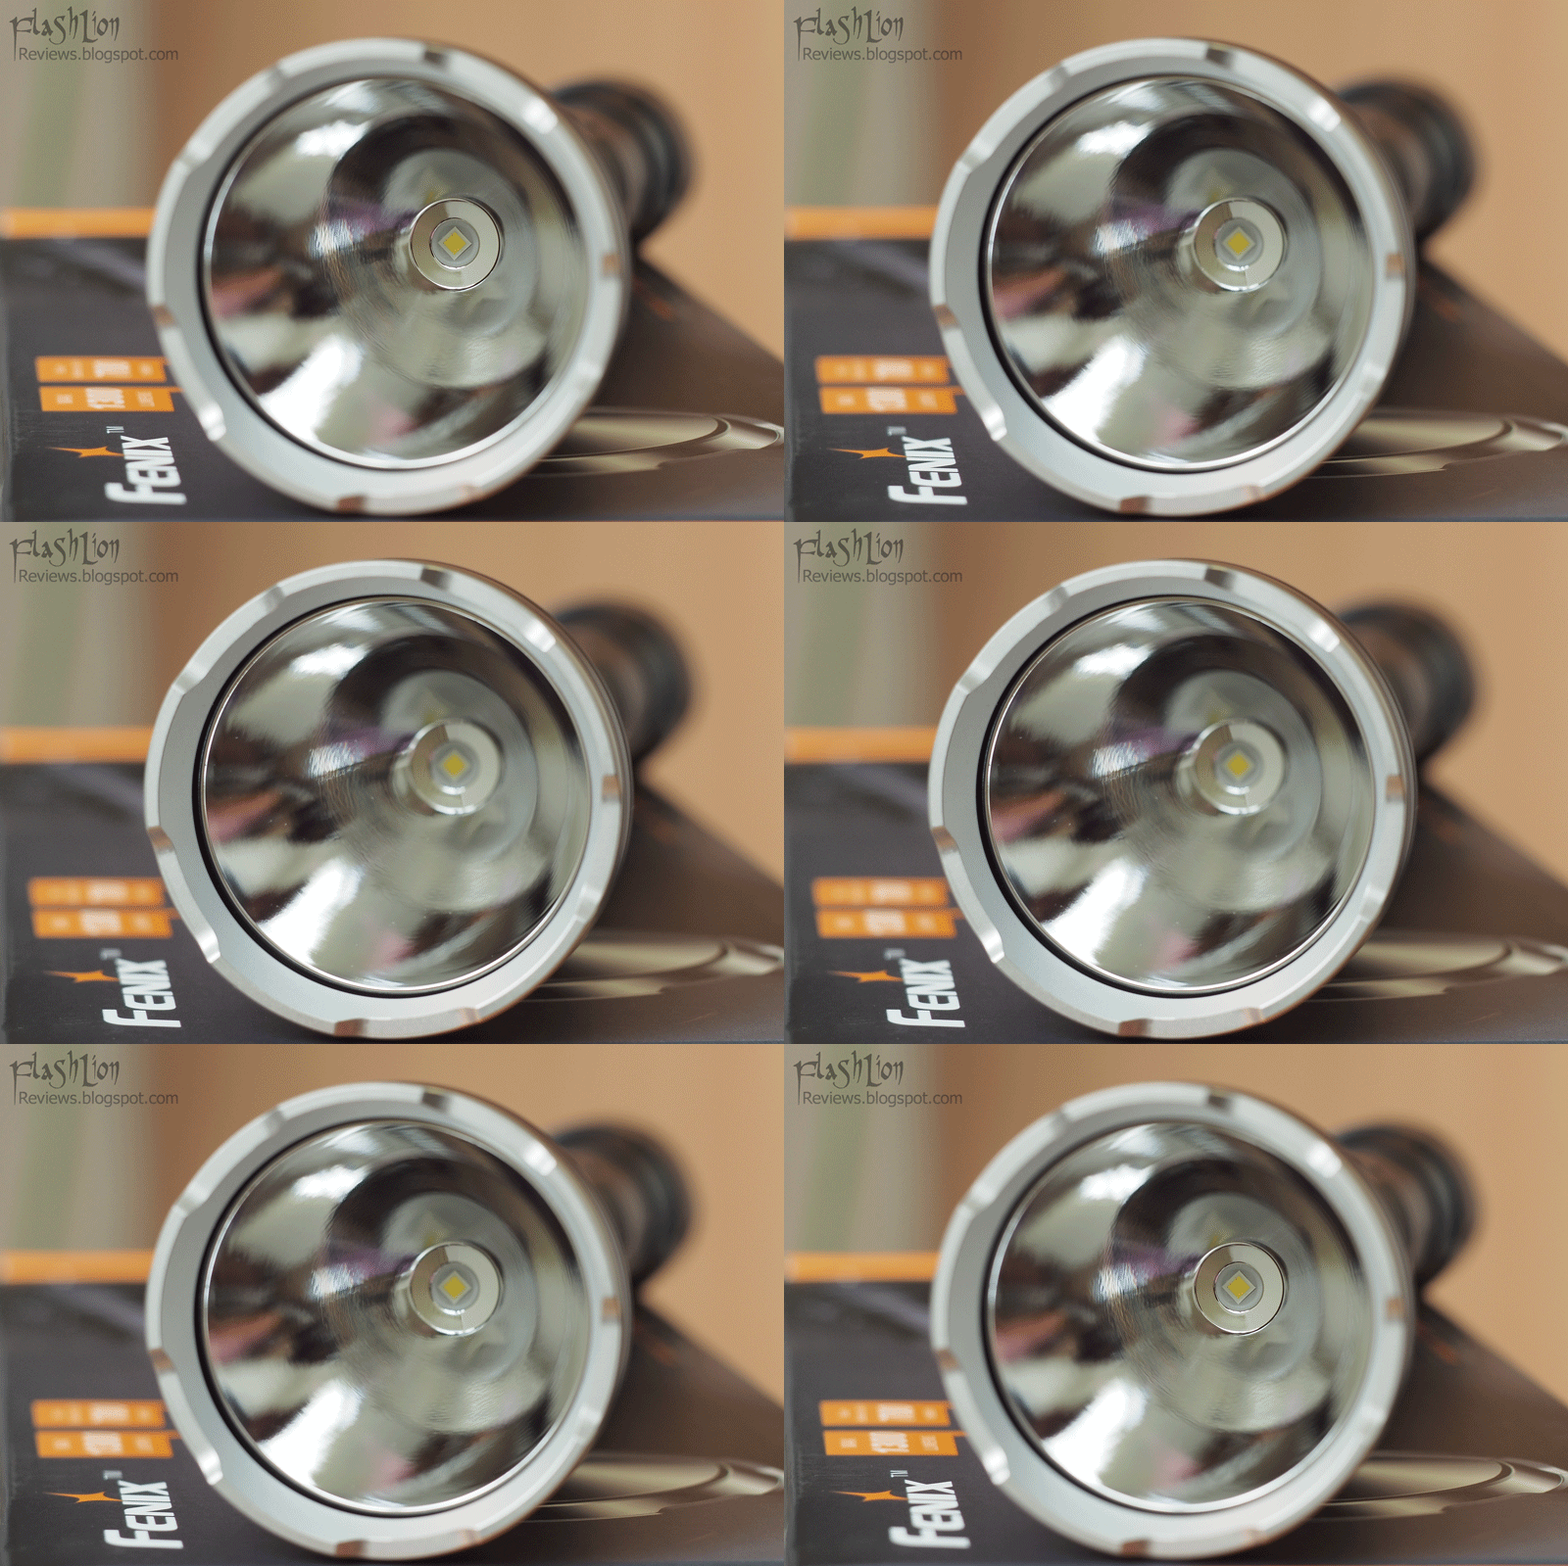
Cree XHP35 Hi LED
Deep aluminum reflector.Stainless steel bezel with matte finish.
As seen in many of the flashlights equipped with the high intensity LEDs,the smooth reflector actually has light pattern which keeps the beam well mixed and smooth,
yet with well defined hotspot but just enough not to allow artifacts or rings in the pattern.
Very clean glass lens with anti-reflective coating.

It is time to see the TK47's beam in action.

Below are pictures of the tail light in its white and red mode.Nice soft diffused light good for walking,reading or as a camping light.
The flashing red light could be pretty helpful as an emergency warning/notification light.

Let's start with the comparison beamshots.
I compared Fenix TK47(XHP35Hi NW) with Thrunite Catapult V5(XM-L2 NW),Olight M3XSUT(XP-L CW dedomed) and Olight SR52UT(XP-L Hi CW).
1 meter 1/100sec White wall
The XHP35Hi shows very similar color beam with the XM-L2 Neutral white LED in Catapult V5.
The hotspot size is also just a bit smaller.

5 meters
All modes plus comparison with the other flashlights.


The TK47 has more yellowish tint,while the Catapult V5 has more like orange/pinkish tint compared to it.
The M3XSUT's beam is what it is.The hotspot from a de-domed XM-L2/XP-L LED is very small and focused,but you have to live with the greenish tint.
The spill of the TK47 and Catapult V5 is brighter without bad tint. The XP-L Hi in the SR52UT produces clean cool white light with bright hotspot,but much less corona and less bright spill.
1/50sec

1/250sec

The M3XSUT is clearly better thrower than the rest of the flashlights in this comparison.The Catapult V5 in its original form with a regular-not flat dome LED focuses less light in the hotspot.
1/1000sec

Outdoor Beamshots
80 meters to the threes.

All modes at close distance.
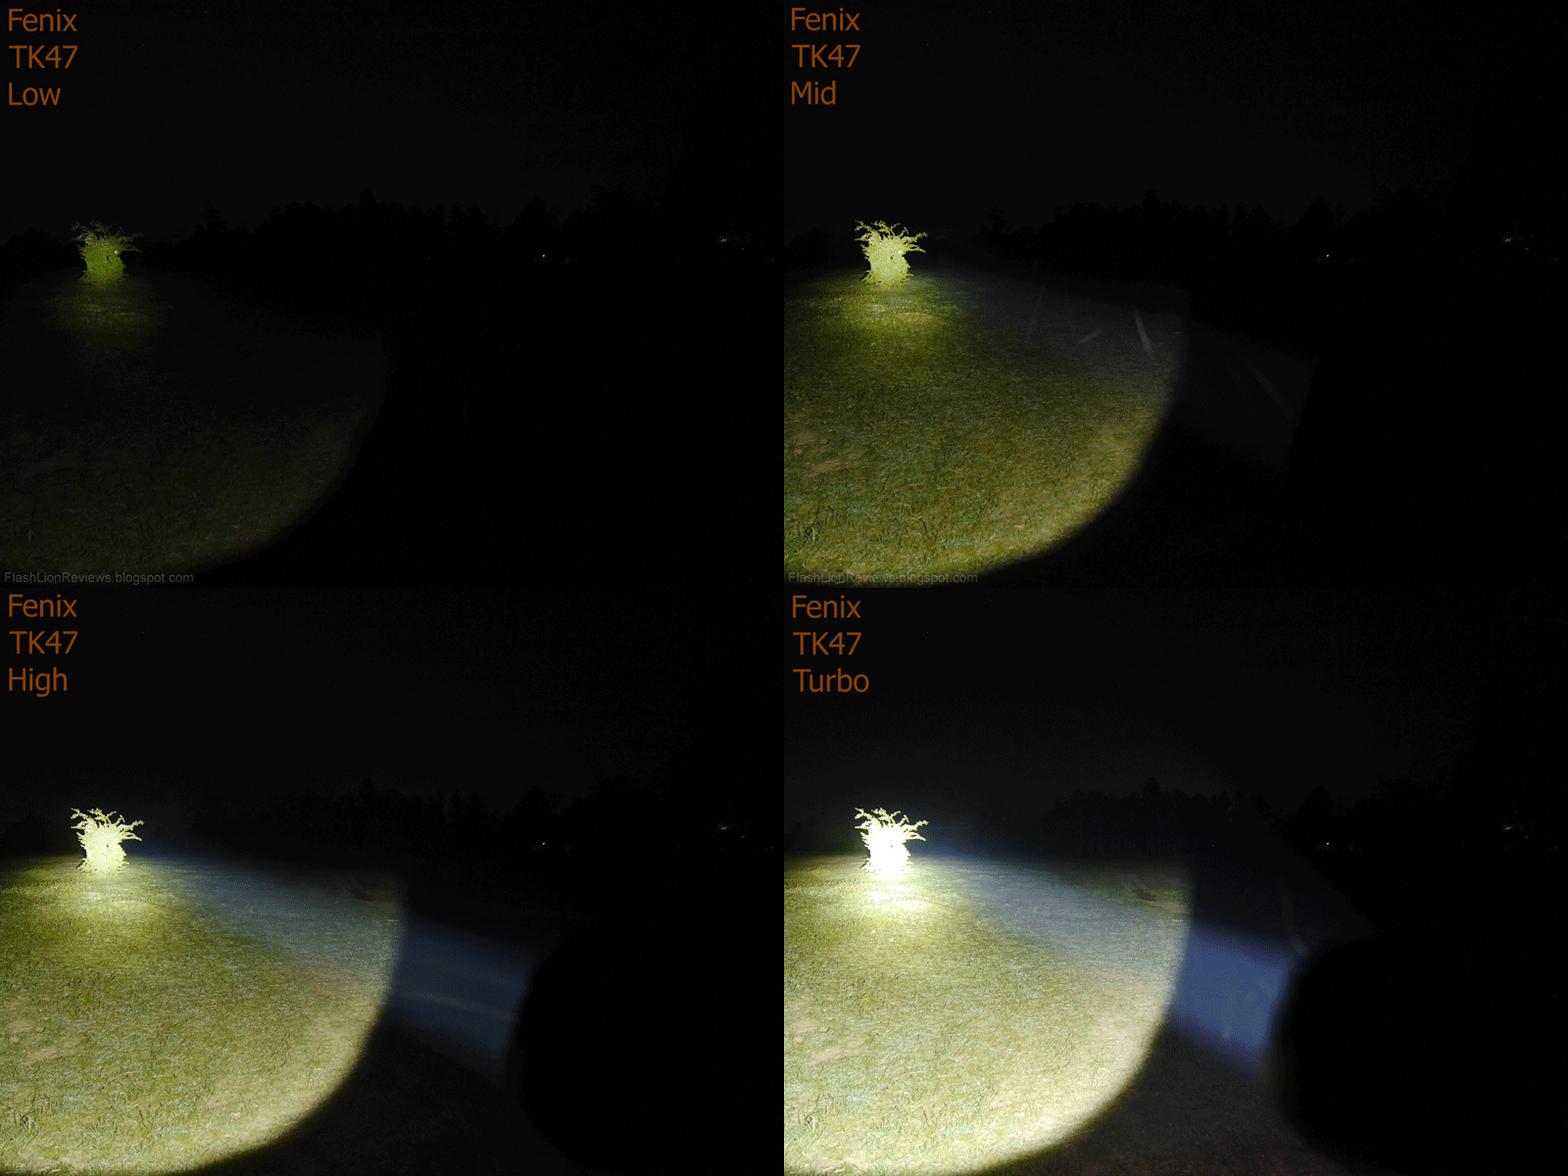
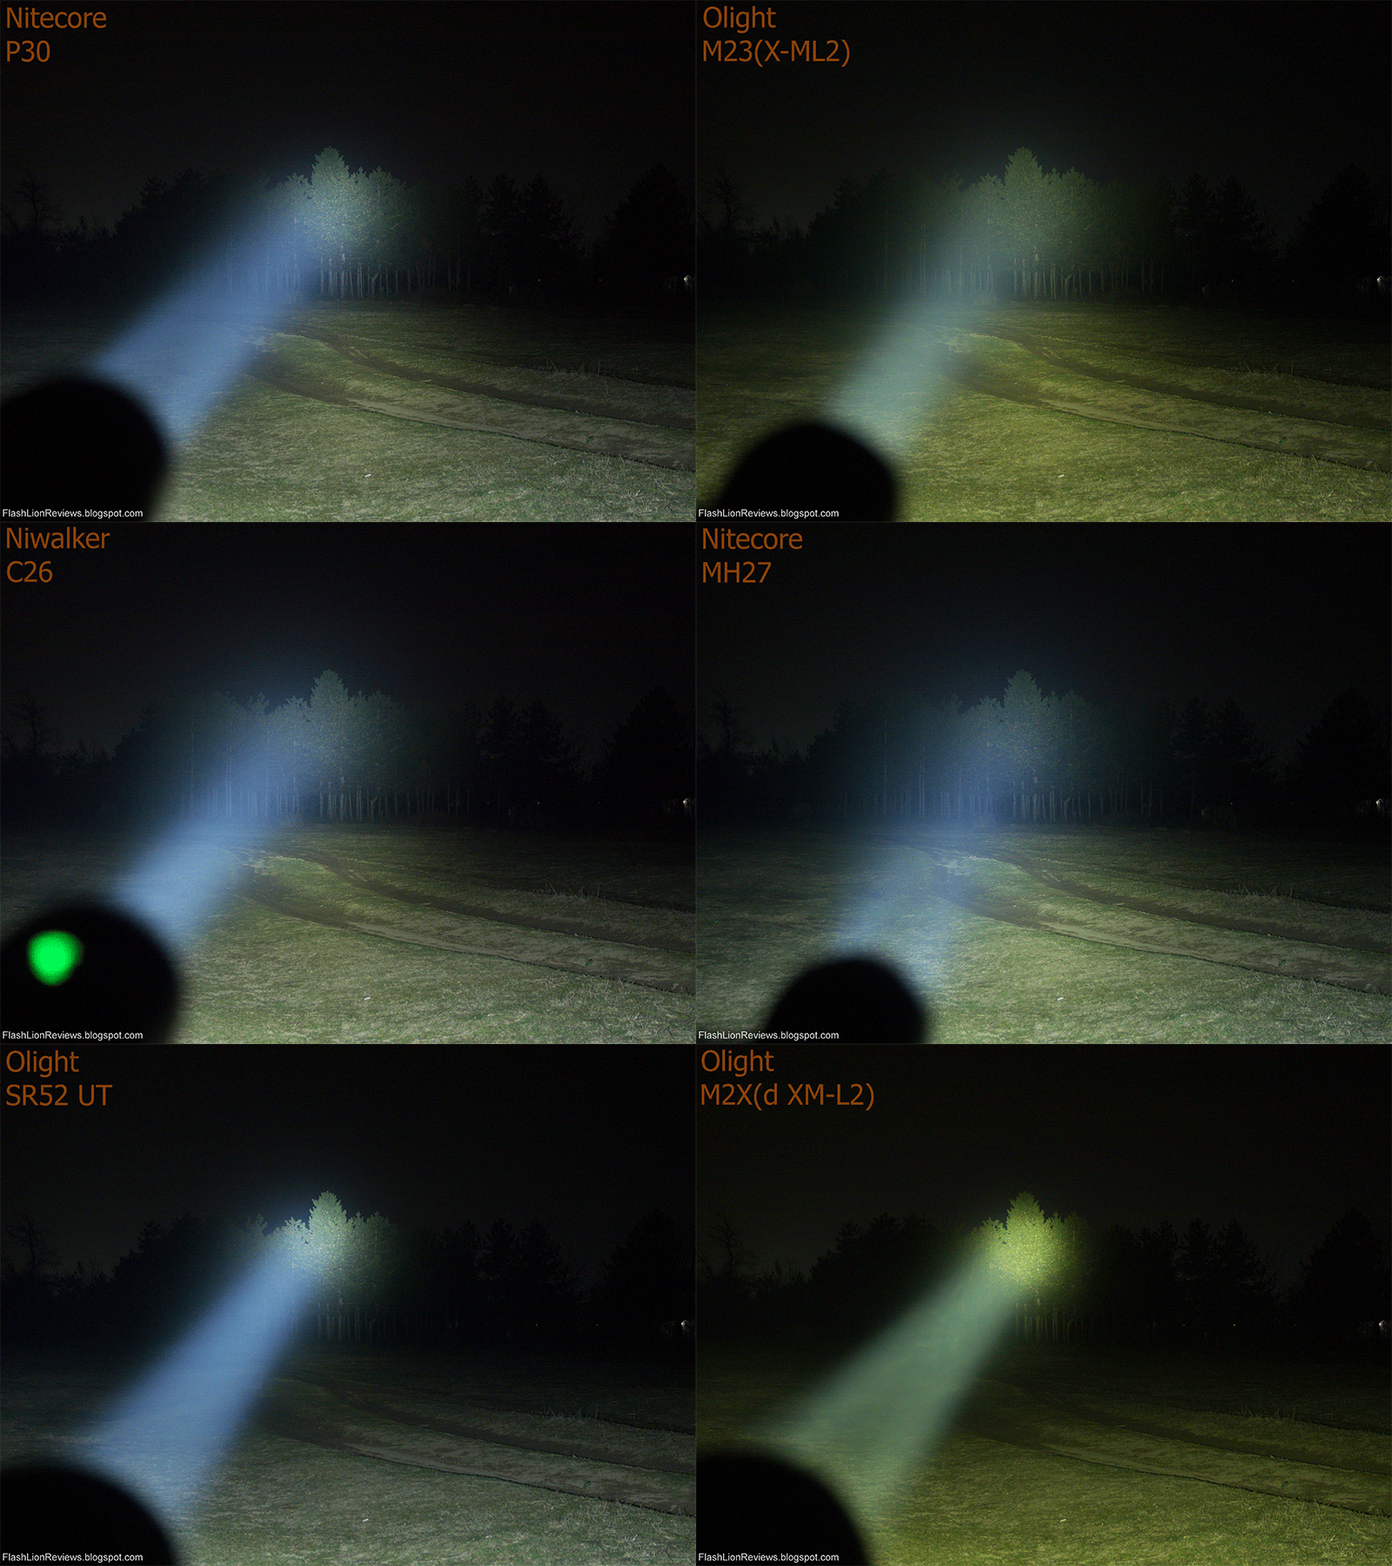
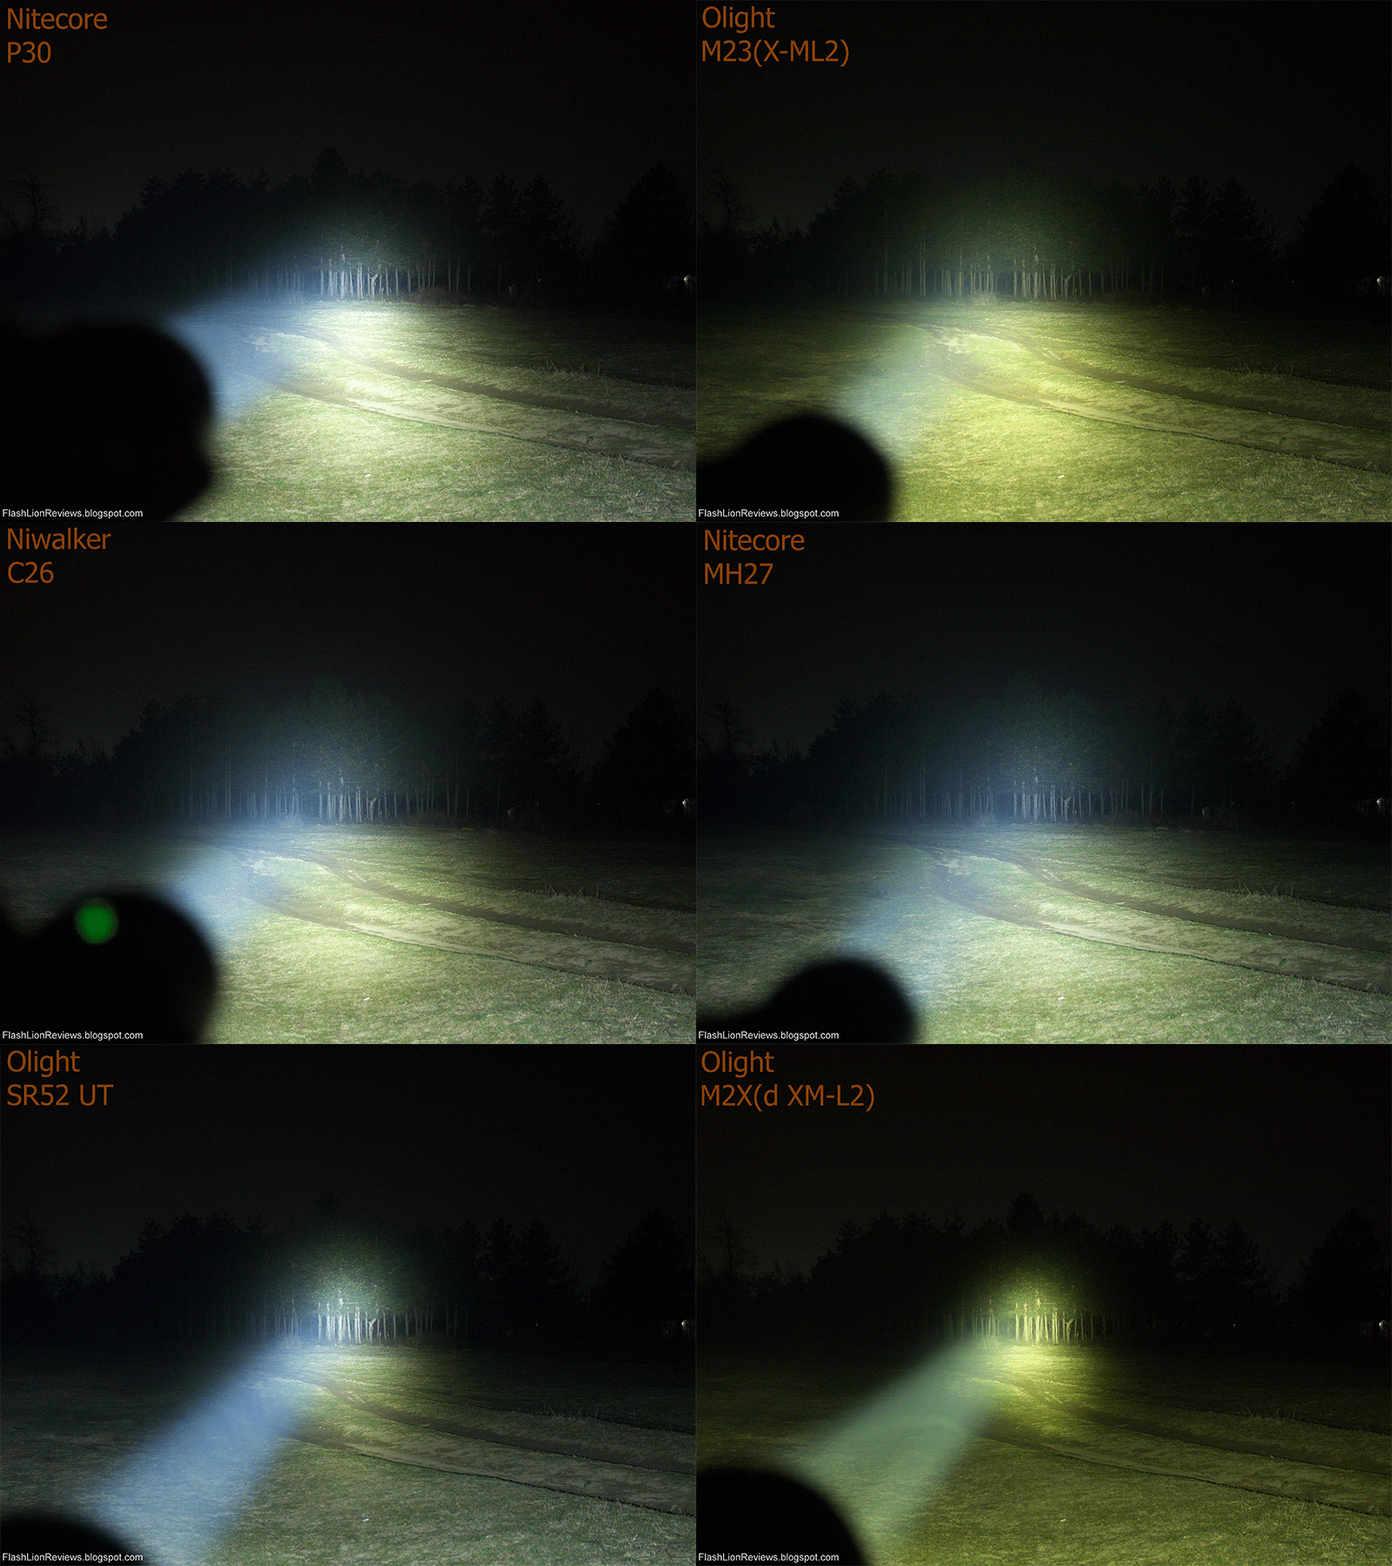
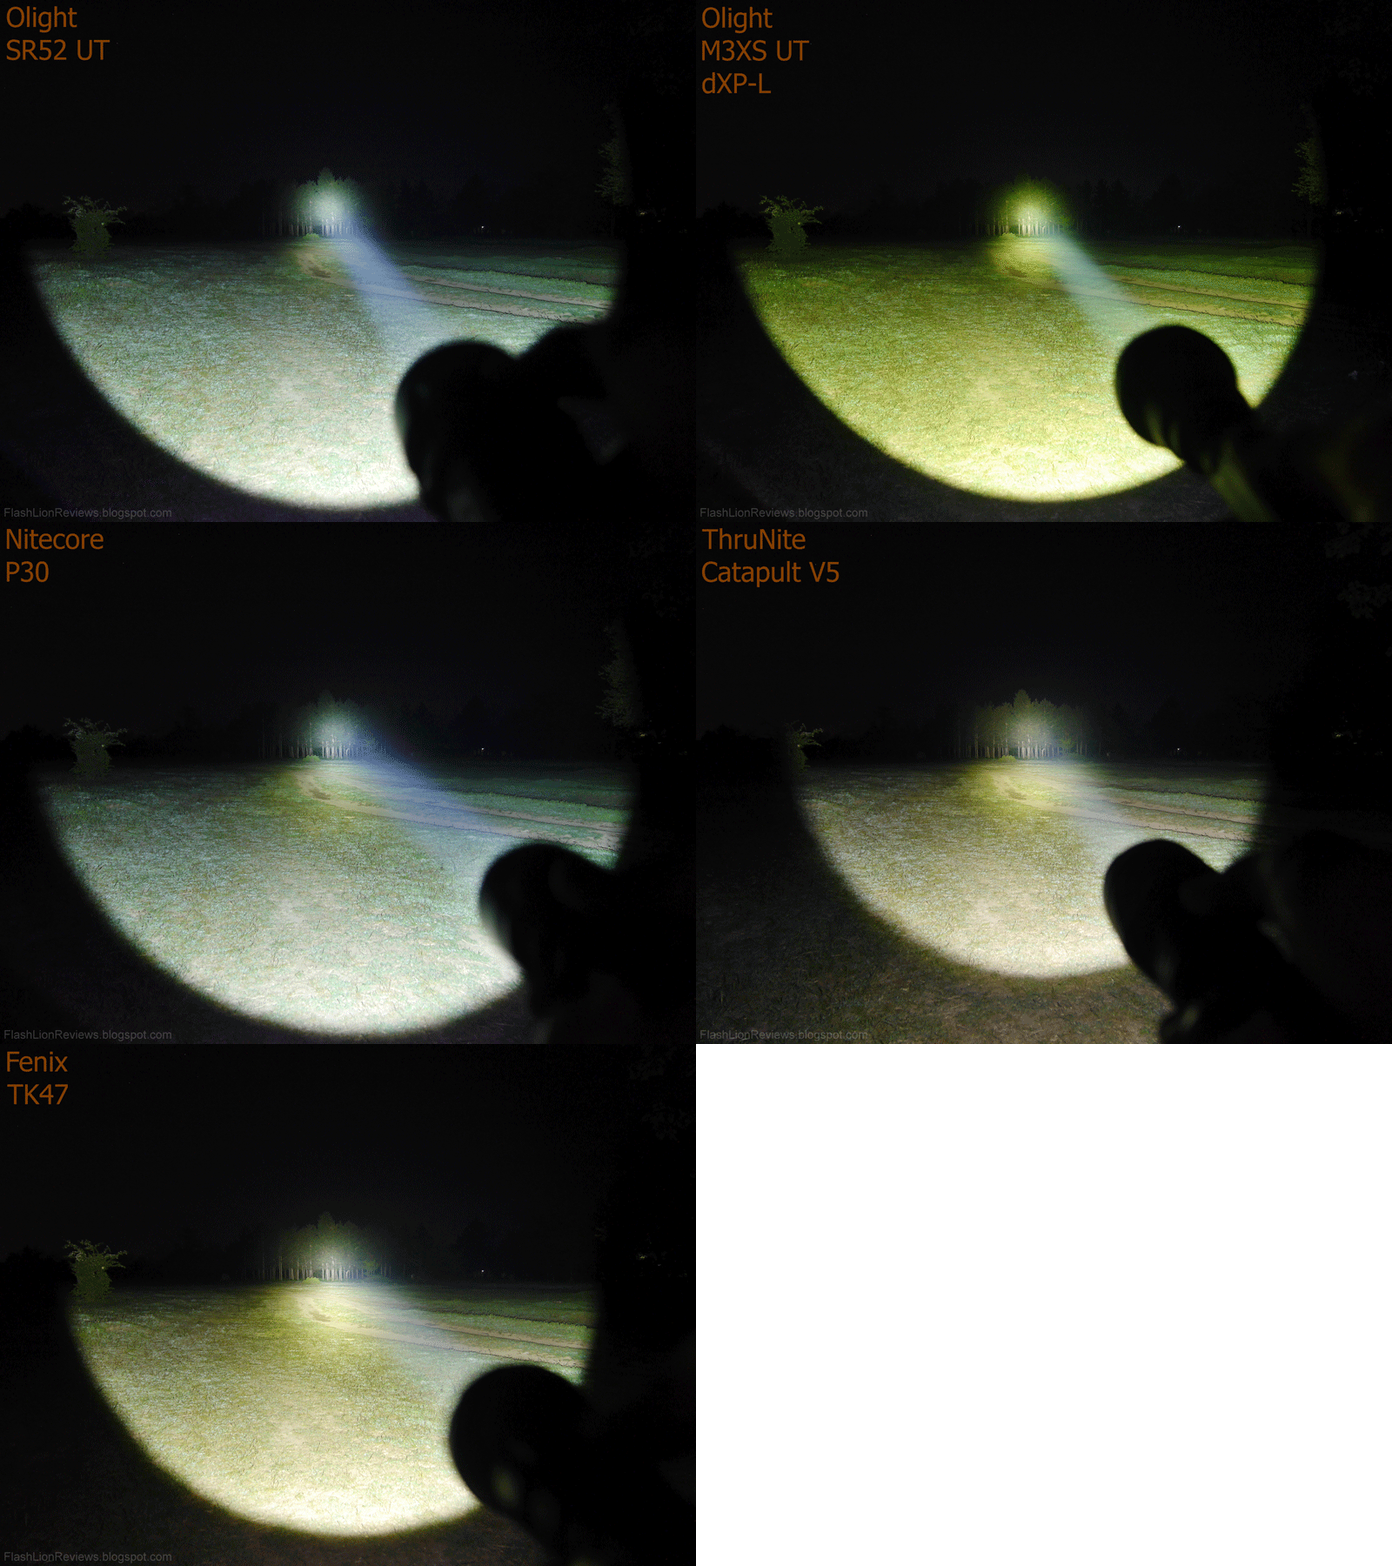
Fenix TK47 all modes and comparison with other flashlight.
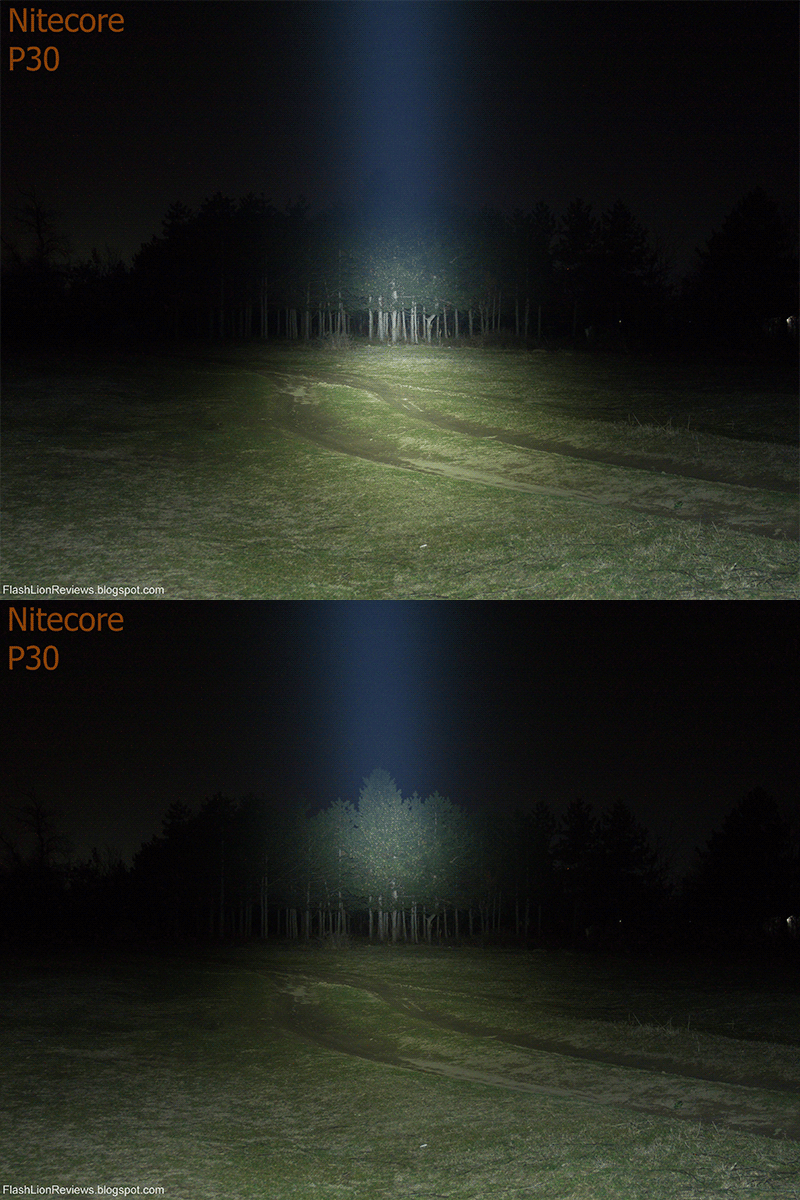
I included the very compact Nitecore P30 for even more interesting comparison.
Peak beam intensity:
Fenix TK47 138kcd, ThruNite Catapult V5 105kcd, Olight M3XSUT 250kcd, Olight SR52UT 190kcd, Nitecore P30 95kcd;
Beam aimed at the bottom of the trees.


All beams in Animated GIF.
Beam aimed at the bottom of the trees.
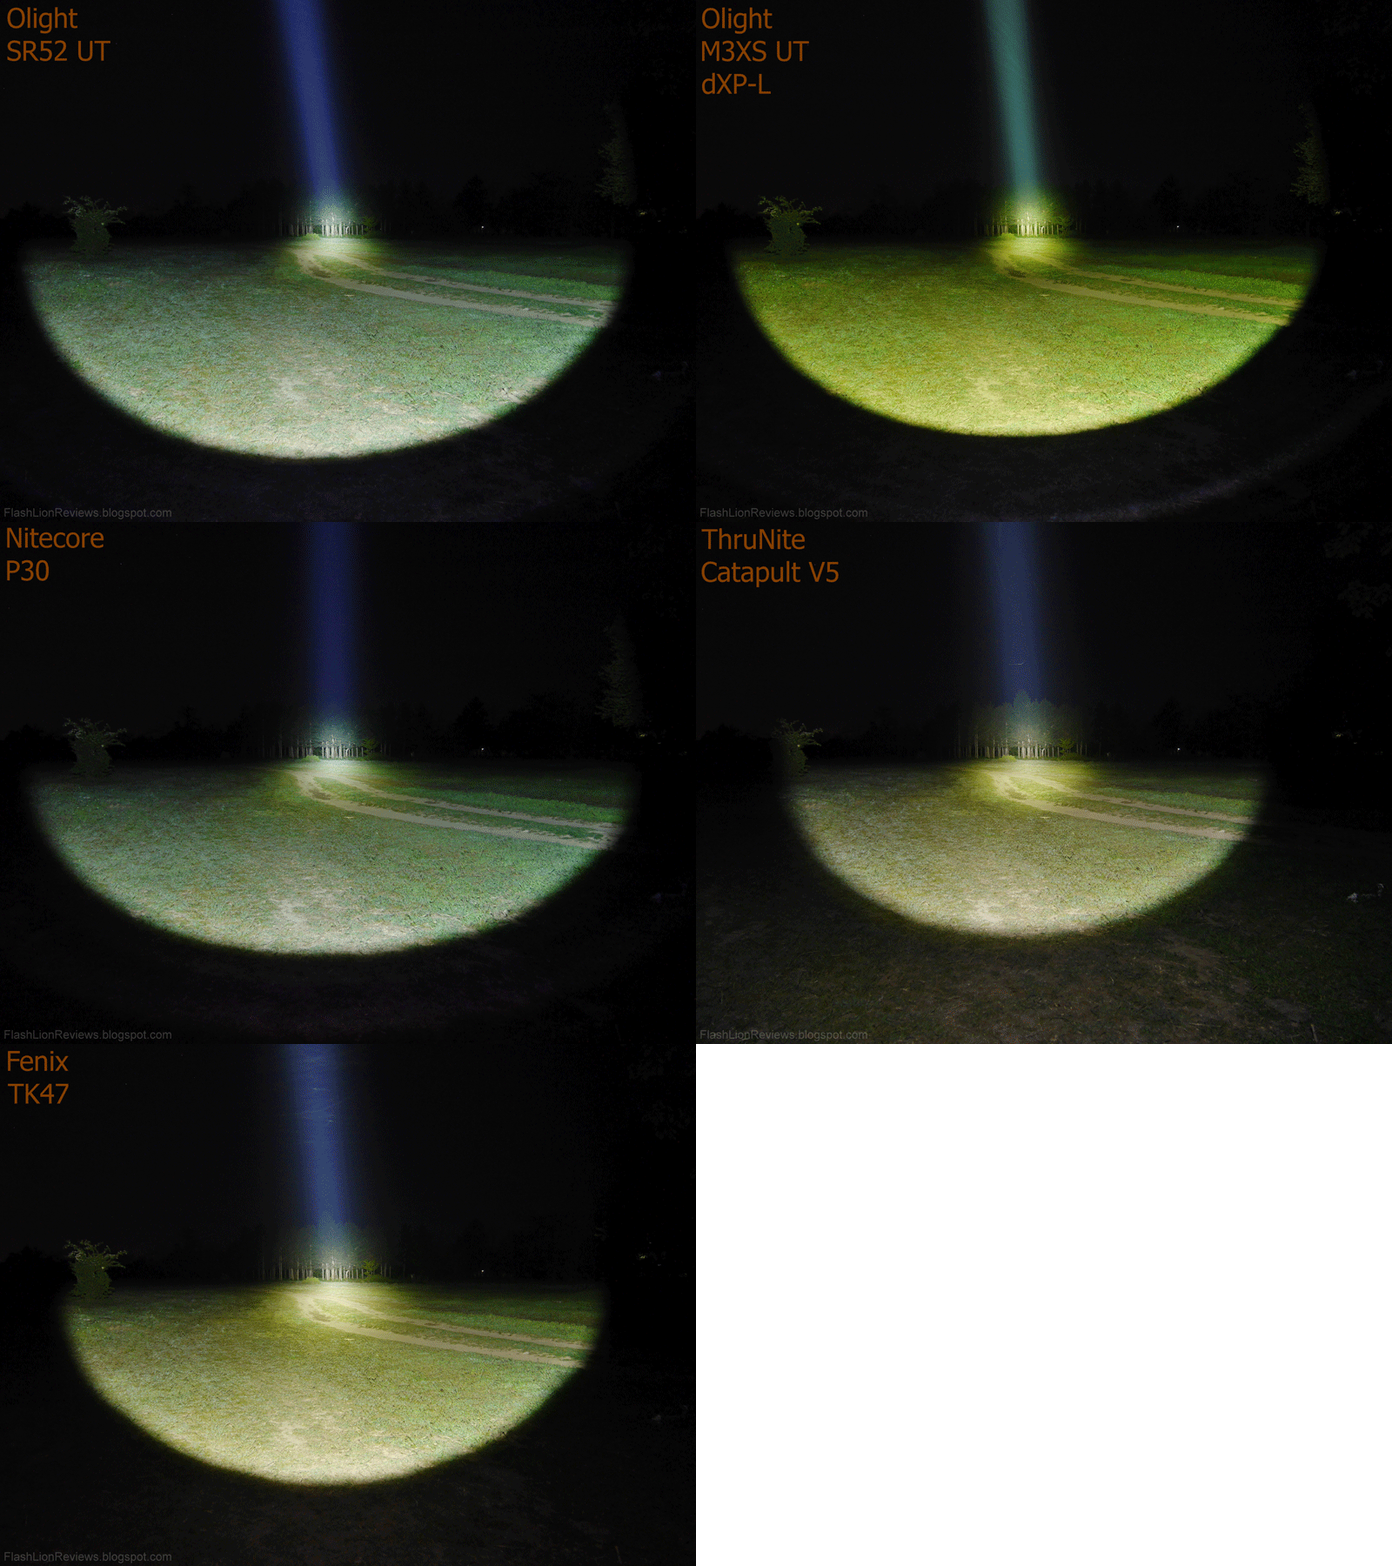
Beam aimed at the top of the trees.

All beams in Animated GIF.
Beam aimed at the top of the trees.
Notice the bright spill of the Catapult V5.
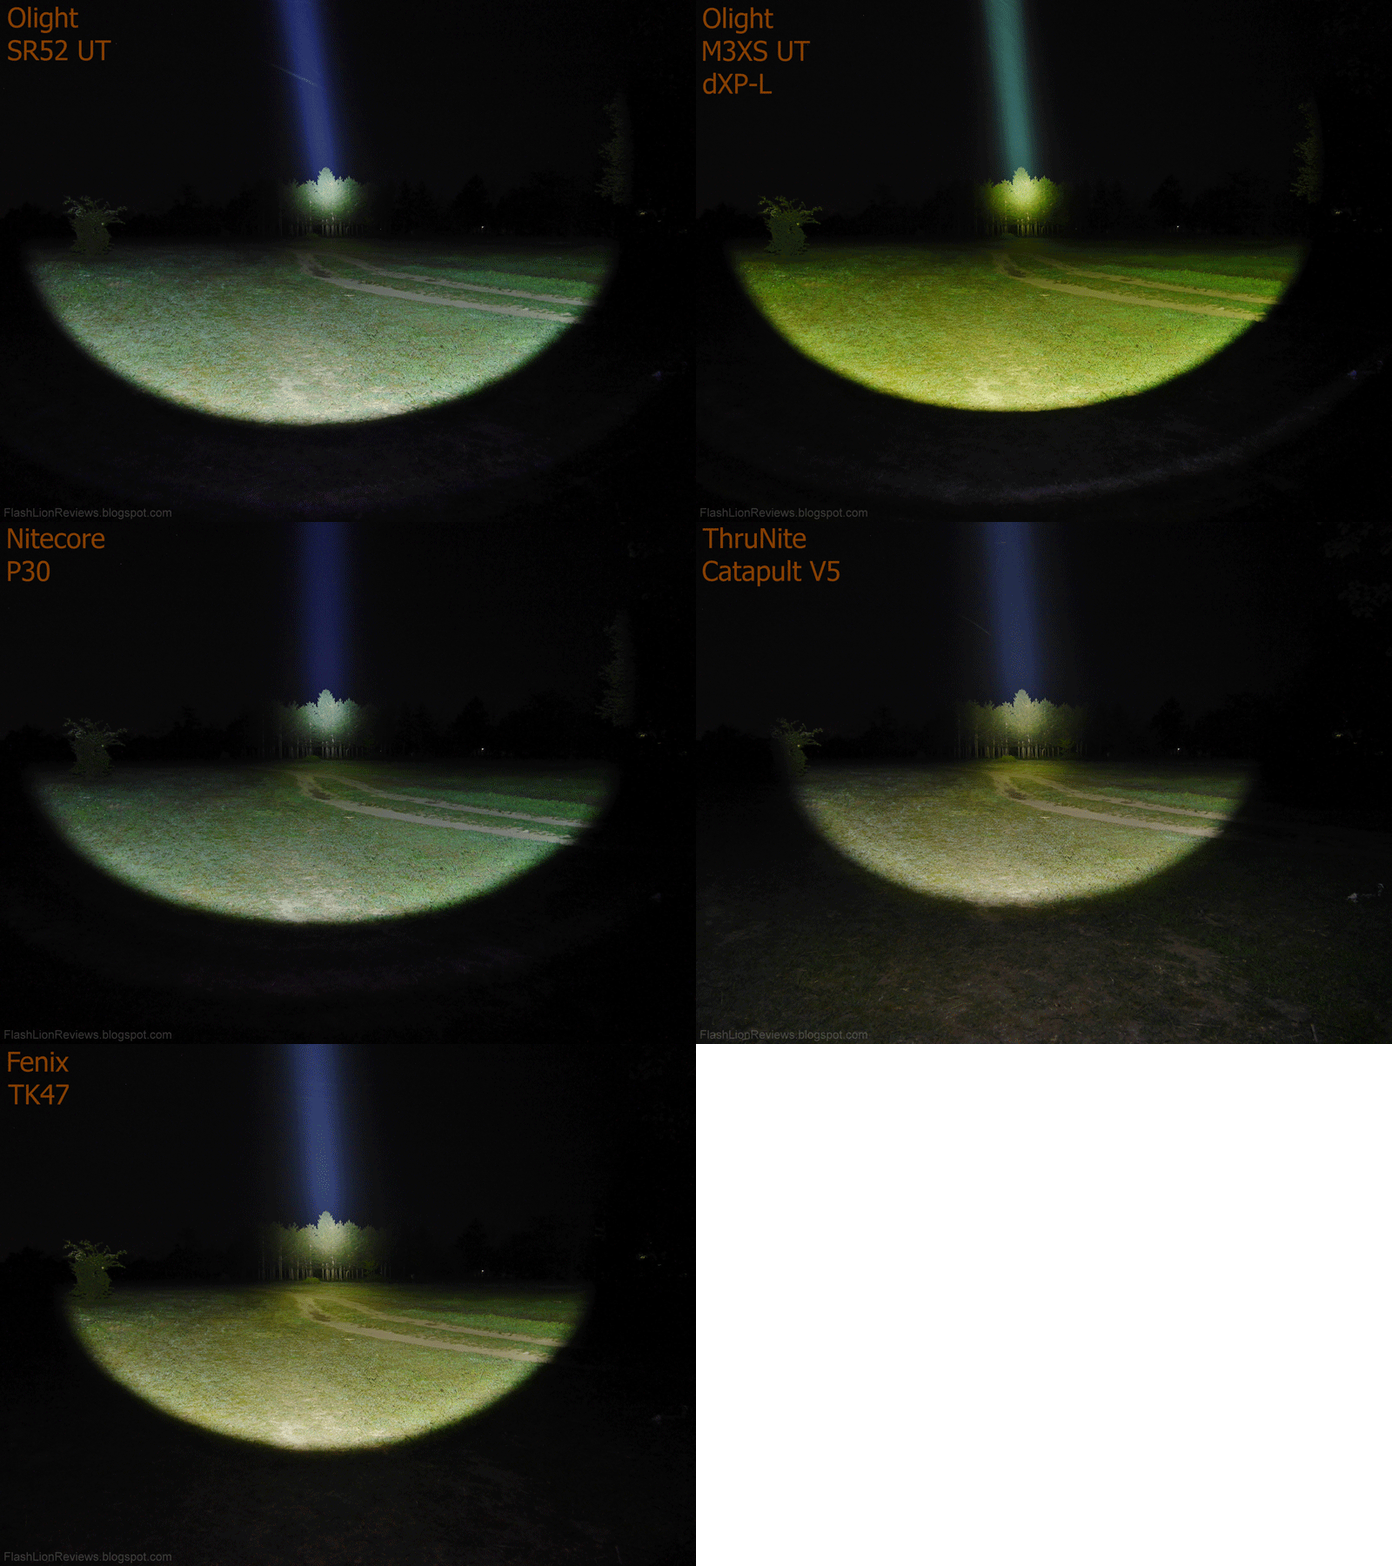
Beam aimed at the top of the trees.
This time in first person view.

All beams in Animated GIF.
Beam aimed at the top of the trees.

Beam aimed at the bottom of the trees.

All beams in Animated GIF.
Beam aimed at the bottom of the trees.
Beamshots of the white and red tail lights.

Strong points:
Sturdy build; Innovative tail light; Simultaneous use of the tail and front beam;
Very pleasant focused front beam and diffused tail light with neutral white light;
Smooth beam without bad artifacts; Well focused hotspot with useful bright spill;
Great brightness regulation with constant Turbo for about 55 minutes;
Well spaced modes; Instant mode memory;
Emergency red light; Tail lockout possible; Comfortable in hand;
Possible weak points(depending on the way of use):
Some may find the holster a little poor for a high quality flashlight like the TK47;
Activating Strobe while trying to turn the light Off.
Somewhat soft switches;Very possible to be pressed accidentally;
Tight fit on some of the batteries with stickers;
No physical switch;No momentary On;More complex battery tube and tail cap;
No anti-roll design;
Thanks for reading!
Thanks to Fenix for providing the TK47 for test and review!